

CHATGPT TO NOTIONを使いたい人
でも、インストールとか使い方がよくわからないな。
ChatGPT to Notionの使い方をわかりやすく教えてよ。
はい、こんなChatGPT to Notionに関する悩みを解決します。
この記事では、ChatGPT to Notionのインストール方法や使い方について説明しています。
メモ
ChatGPT to Notionを使うには、ChatGPTとNotionの両方にアカウントが必要です。
もし、お持ちでない場合は以下から登録してください。(どちらも無料で作れます。)
※Notionの登録方法については、以前に記事を書いていますので、必要があれば参照ください。
この記事を読んだ結果は、以下です。
こんな感じで、バッチリ解決できます。
では、どうぞ。
おりゃー!パワー全開!気合をいれるぜ!
【目次】
1.【ChatGPT to Notion】インストール方法と使い方(はじめに)
1-1. ChatGPT to Notionとは
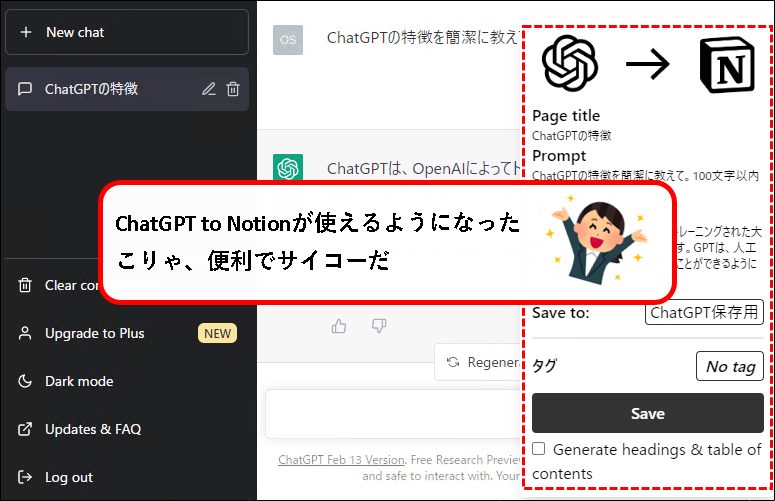
★ ChatGPT to Notionは、ChatGPTとの会話や回答を、Notion上に保存するツールです。
保存しておきたいChatGPTの回答などを、カンタンにNotionに取り込むことが可能。
注意
Théo Lartigauさんという人が作成したGoogle Chromeの拡張機能になります。
そのため、パソコン上のGoogle Chromeでしか使えません。
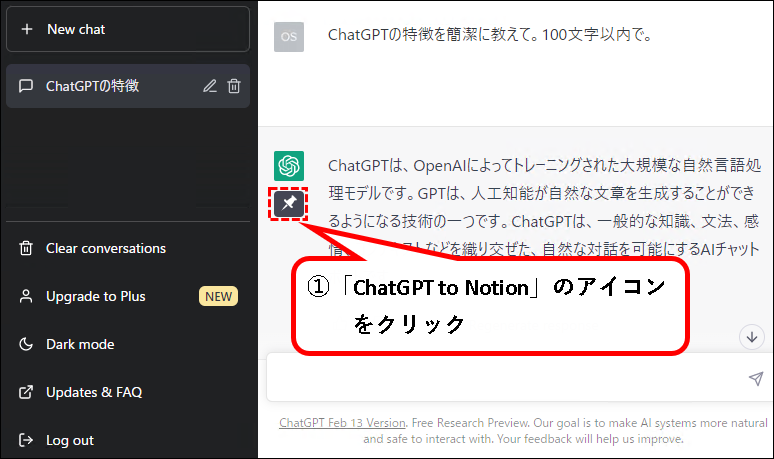
★ こんな感じで使います。
- ChatGPTが表示されている状態で、「ChatGPT to Notion」アイコンをクリック
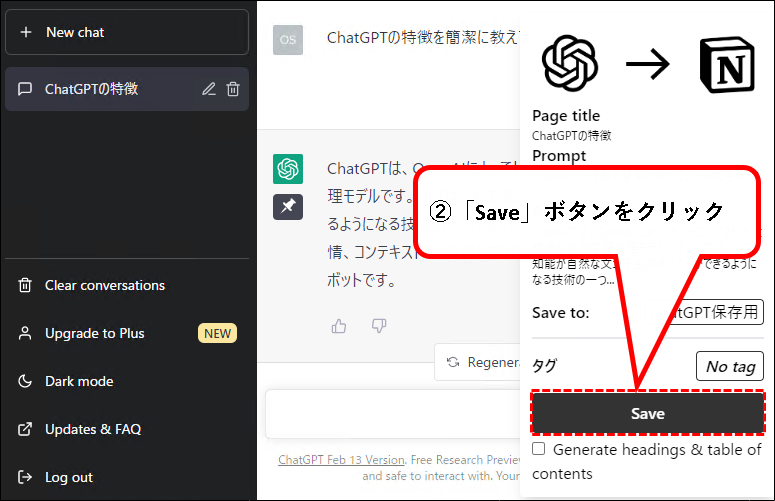
- 「Save」をクリック
- Notion上にChatGPTの回答が保存される
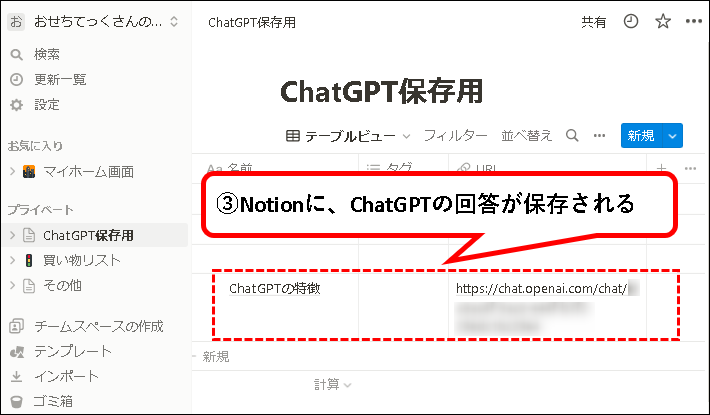
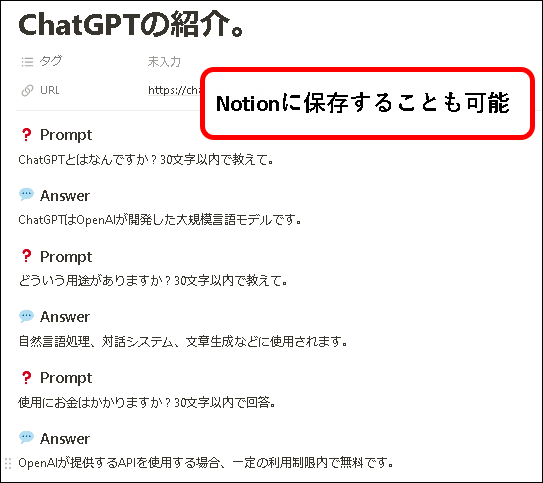
保存されたデータの中身はこういう感じです。

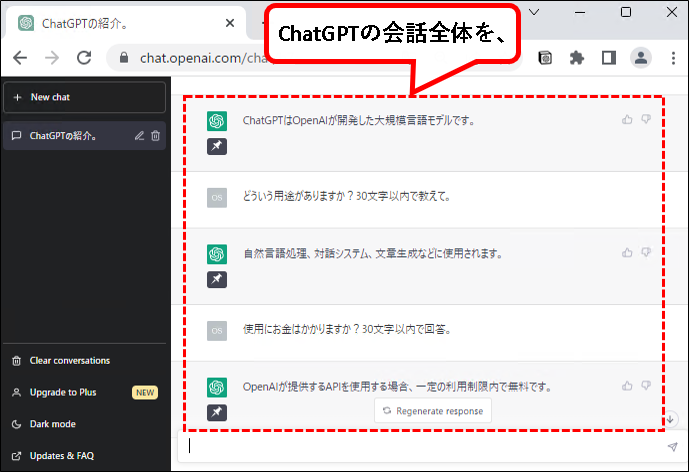
以下のように、会話全体を保存することもできます。
1-2. 記事の内容
★ この記事の説明している内容は以下です。
★ 上から順番に読んでもらえれば、大丈夫です。
注意事項:ChatGPT to Notionが使えない場合
ChatGPTのアップデートが原因で、「ChatGPT to Notion」が、うまく使えないことがあります。
しかし、これまでの経験では、数日くらい待てば、(おそらく作成者が対応してくれて、)再び使用できるようになりました。
そのため、手順どおりやっても使えない場合は、しばらく待ってみると改善される可能性があります。
2. ChatGPT to Notionをインストールする方法
★ Google Chromeに、ChatGPT to Notionをインストールする方法を説明します。
★ インストール方法は以下です。
注意事項
手順や画像は、WindowsPCのGoogle Chromeで作成しています。
環境が異なる場合、表示されるメッセージなど記載とすこし異なる場合があります。
異なる場合は、適当に読み替えてください。
手順1. まず最初に、chrome ウェブストアにアクセスします。
以下のリンクをクリック。
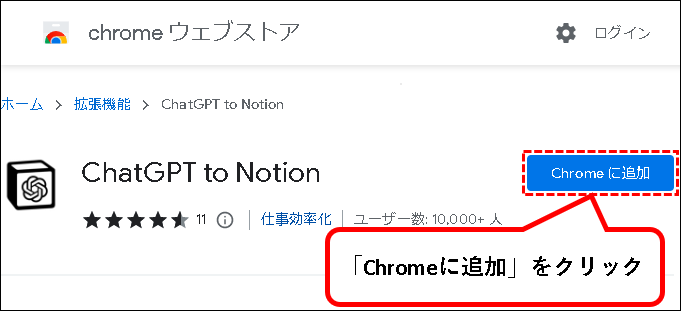
手順2. chrome ウェブストアの画面が表示されるので、「Chromeに追加」をクリックします。
手順3.「拡張機能を追加」をクリックします。

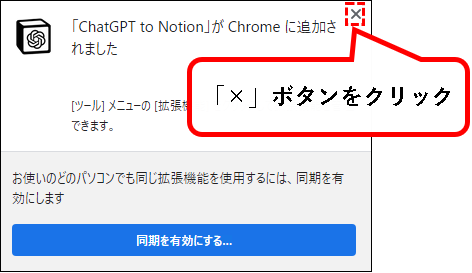
手順4. 以下のようなメッセージが出てきた場合、「×」ボタンをクリックします。
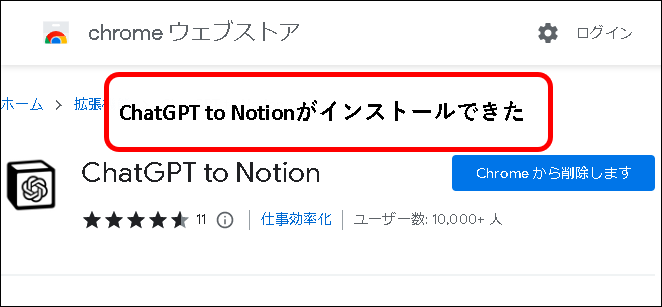
手順5. はい、これで、ChatGPT to Notionがインストールできました。
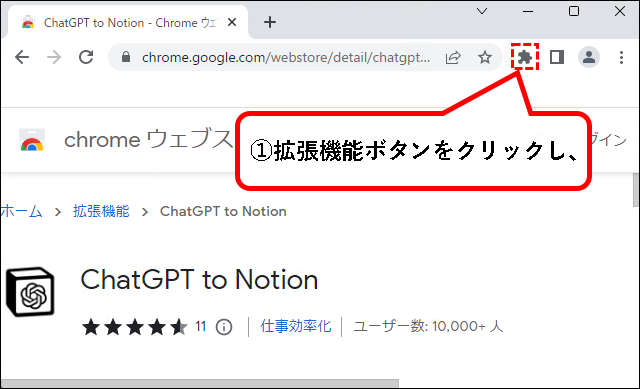
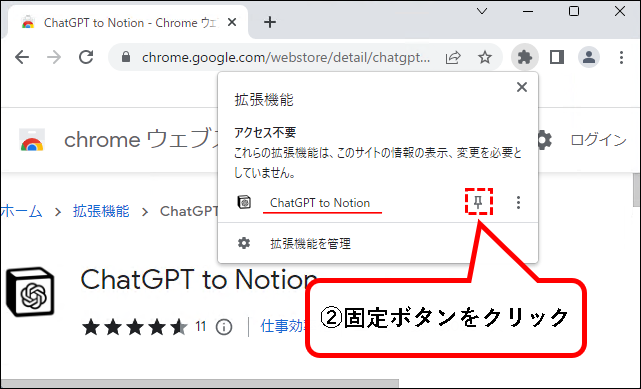
手順6. アイコンをツールバーに表示します。①ツールバー上の拡張機能ボタンをクリックし、②ChatGPT to Notionの横にある固定ボタンをクリック。
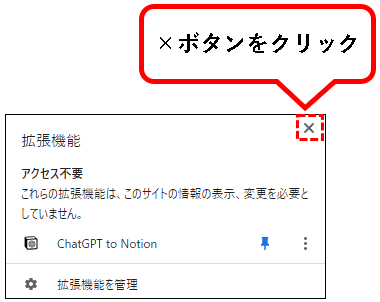
手順7. 拡張機能のウィンドウは、×ボタンをクリックして閉じます。
手順8. ChatGPT to Notionのアイコンがツールバーに表示されました。
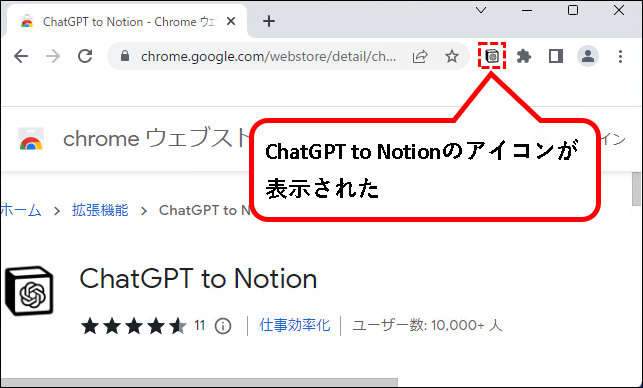
はい、これでChromeに、拡張機能「ChatGPT to Notion」を追加できました。
3. ChatGPT to Notionの使い方
★ インストールしたChatGPT to Notionを使い、ChatGPTの回答をNotionに保存する方法を説明します。
次の内容を説明します。
3-1. 事前準備
★ まずChatGPT to Notionを使うために、準備を行います。
★ 以下を順番に行ってください。
3-1-1. Notion上に、ChatGPT保存用のデータベースを作成する
手順1. Notion上で、新しいページを追加し、「テーブル」をクリックします。
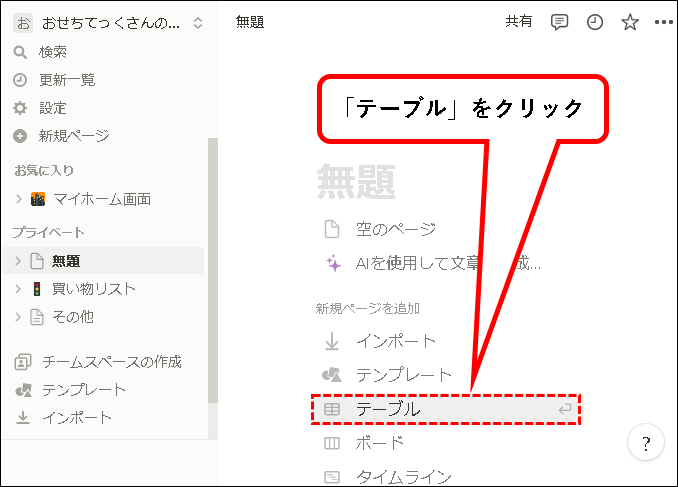
※新しいページを追加するには、左のメニューから、「新規ページ」をクリックします。
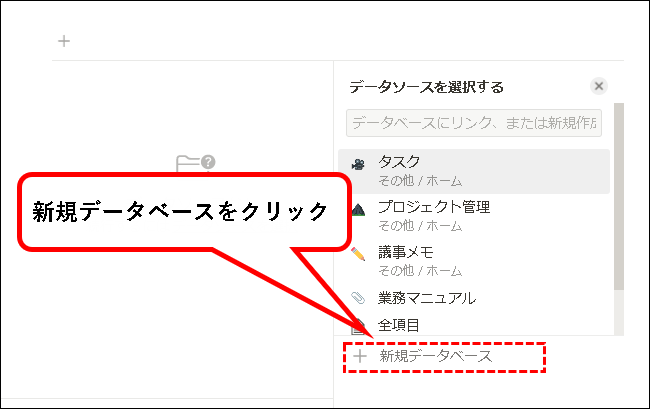
手順2. データソースを選択するメニューから、「+ 新規データベース」をクリックします。
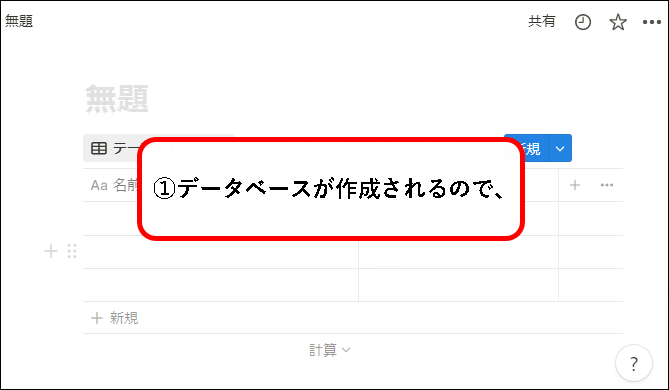
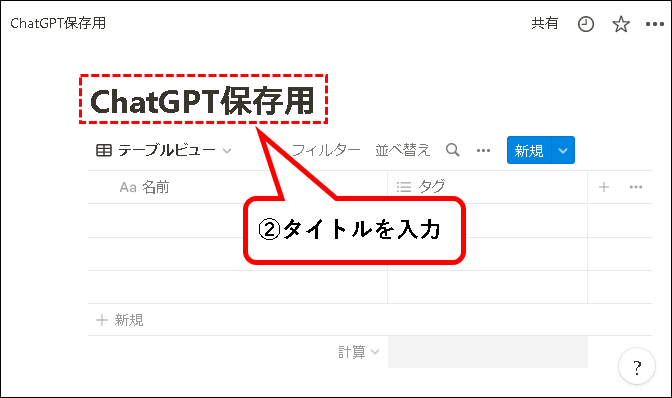
手順3. ①データベースが作成されるので、②適当なタイトルを入力します。
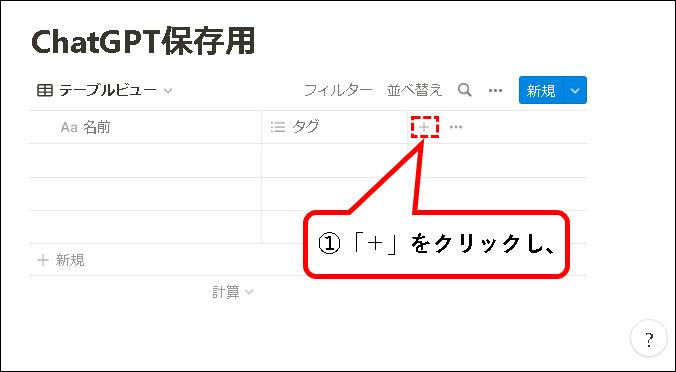
手順4. データベースにプロパティ「URL」を追加します。①プロパティ名の列の右端にある「+」マークをクリックし、②表示された一覧から「URL」をクリック。

メモ
ChatGPT to Notionのデータを保存するには、URLプロパティは必須です。
(URLプロパティのあるデータベースなら、保存はできる)
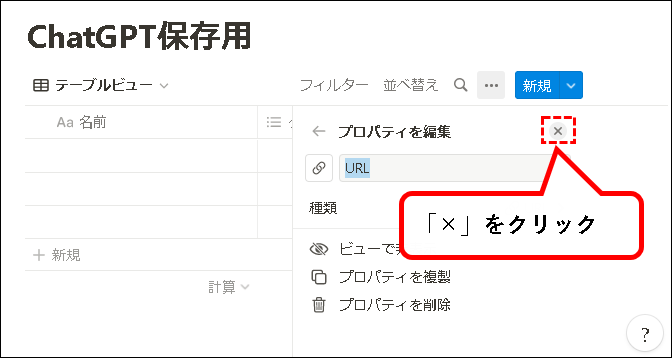
手順5.「プロパティの編集」を×マークをクリックして閉じます。
手順6. データベースに「URL」プロパティを追加できました。
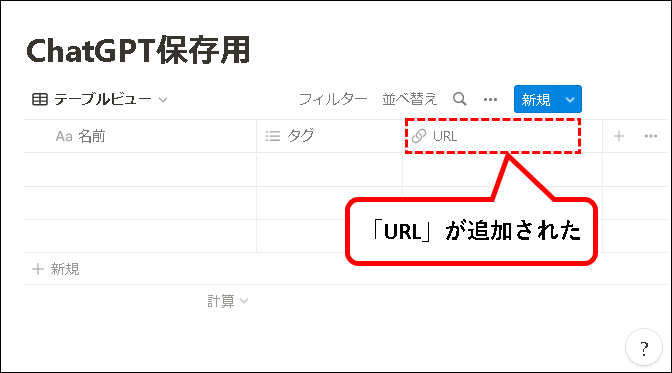
これで、ChatGPTのデータを保存するデータベースは作成できました。
続けて、ChatGPT to Notionを、Notionとリンクさせます。
3-1-2. ChatGPT to Notionを、Notionにリンクする
以下の手順を実施してください。
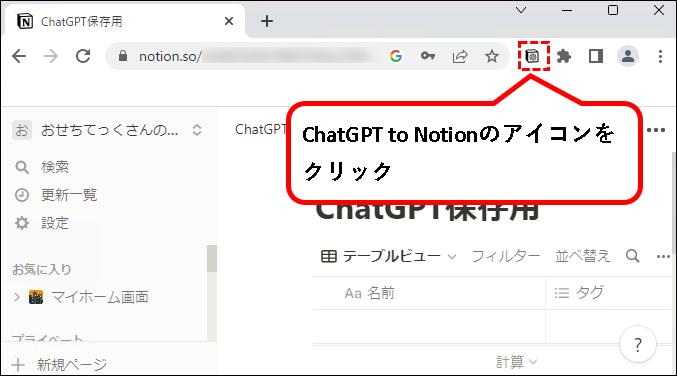
手順1. ChatGPT to Notionのアイコンをクリックします。
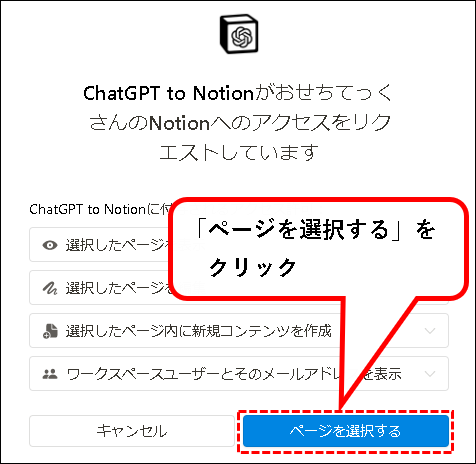
手順2. 以下のような画面が表示されるので、「ページを選択する」ボタンをクリックする。
手順3. データベースを選択する画面が表示されます。①さきほど作成したデータベースにチェックをつけ、②「アクセスを許可する」ボタンをクリックします。
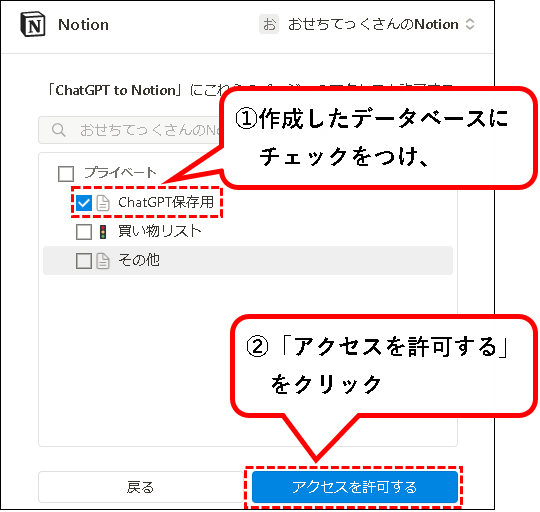
※作成したデータベースが表示されていない場合、検索窓から検索すれば、表示されます。
手順4. ChatGPT to Notionを、Notionにリンクできました。
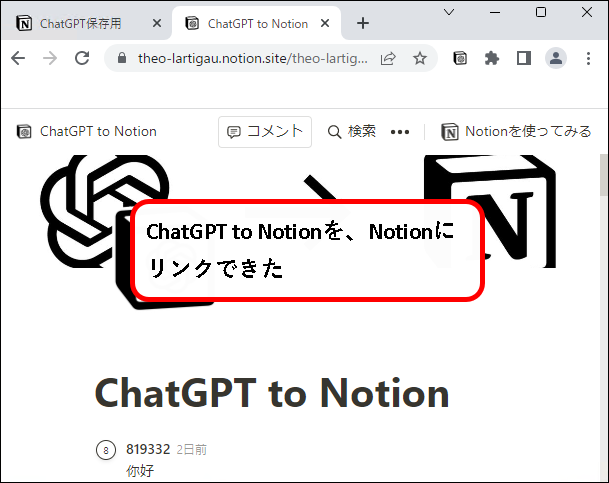
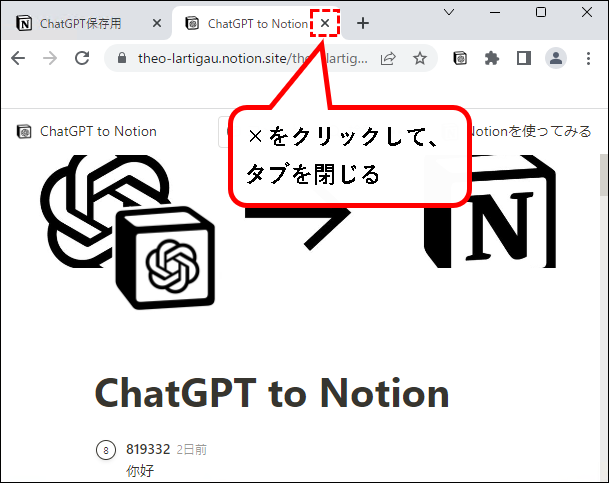
手順5. 以下のタブは必要ありませんので、×をクリックしてタブを閉じてください。
はい、これで、事前準備は完了です。
3-2. ChatGPT to Notionの使い方
★ ChatGPT to Notionでは、次の2通りの方法が使えます。
★ それぞれ使い方の手順を説明します。
a)回答単位でNotionに保存する
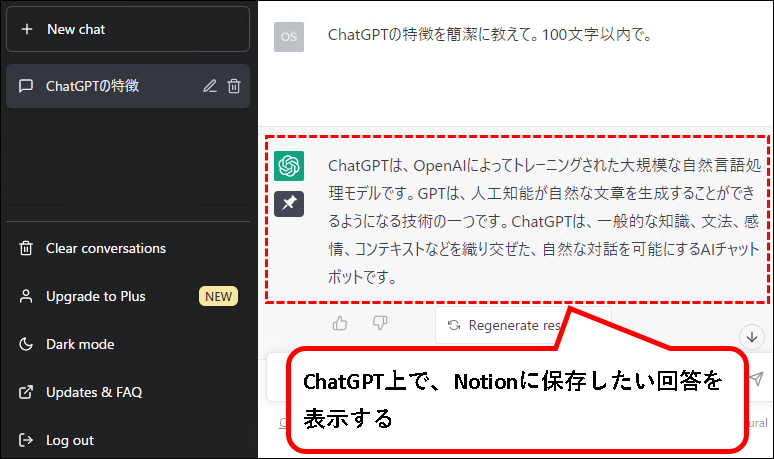
手順1. まず、ChatGPTにアクセスし、ChatGPT上で、Notionに保存したい回答を表示します。
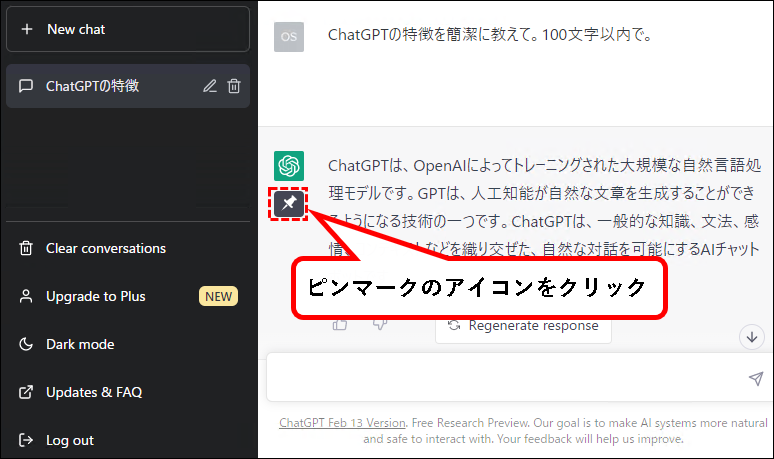
手順2. 回答に表示されているピンマークのアイコンをクリックします。
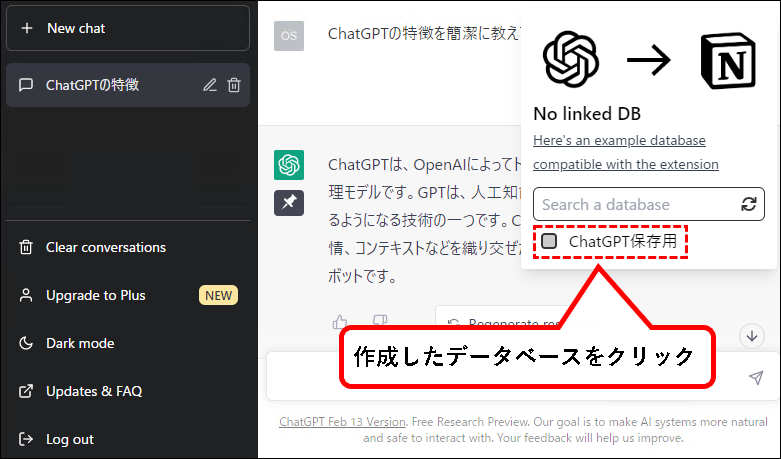
手順3.「No linked DB」と表示された場合、さきほど作成したデータベースをクリックします。
手順4. 以下のようなウィンドウが表示されるので、①「Generate headings~」のチェックを外し、②「Save」ボタンをクリックします。
※「Generate headings~」のチェックが最初から外れている場合、そのまま「Save」をクリック。


メモ
手順では、「Generate headings~」のチェックを外していますが、外さなくても保存は可能です。
その場合、見出し付きで、Notionに回答が保存されます。
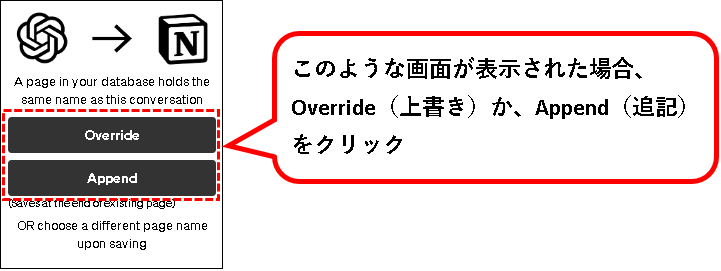
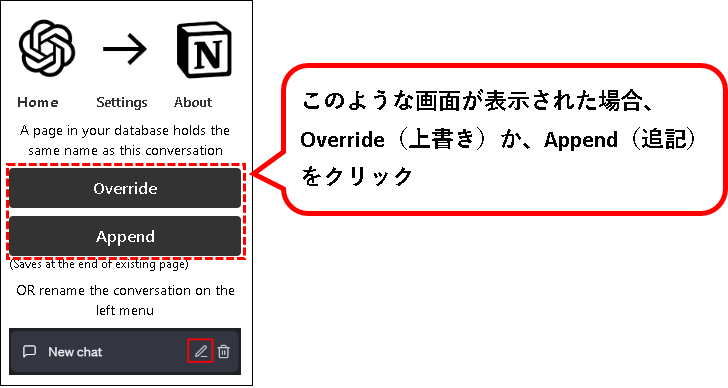
手順5. 以下のような画面が表示された場合、Overide(上書き)かAppend(追記)をクリックします。
メモ
Notionのデータベースには、ChatGPTの会話単位でデータが保存されます。
そのため、すでに同じ会話から、回答や会話全体をデータベースに保存していた場合、上書きするか、追記するかの選択を求められます。
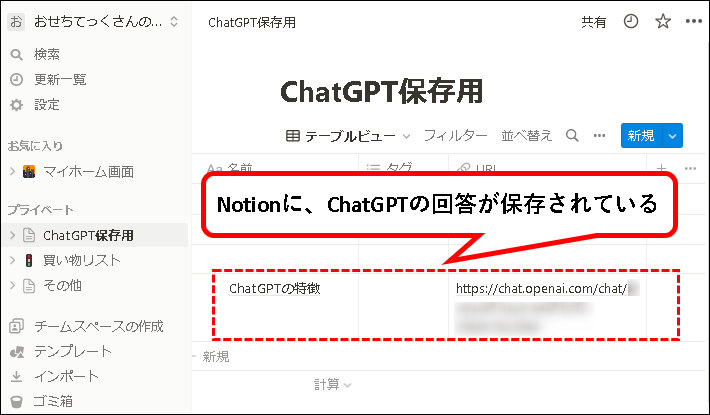
手順6. はい、これで保存できました。Notionをみると、データベースにChatGPTの回答が保存されています。
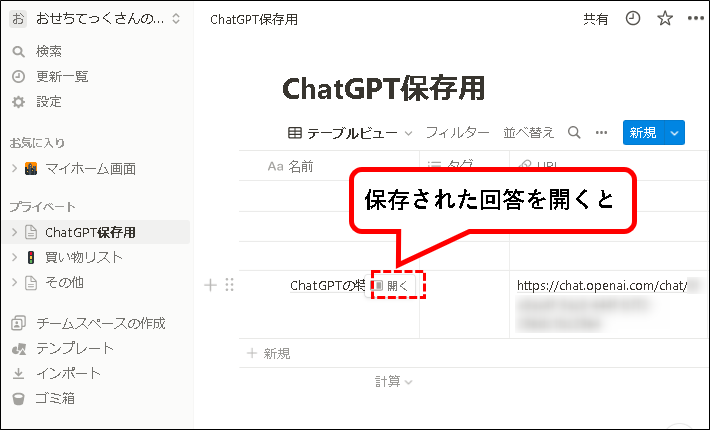
手順7. 保存された回答を開くと、中身を確認できます。
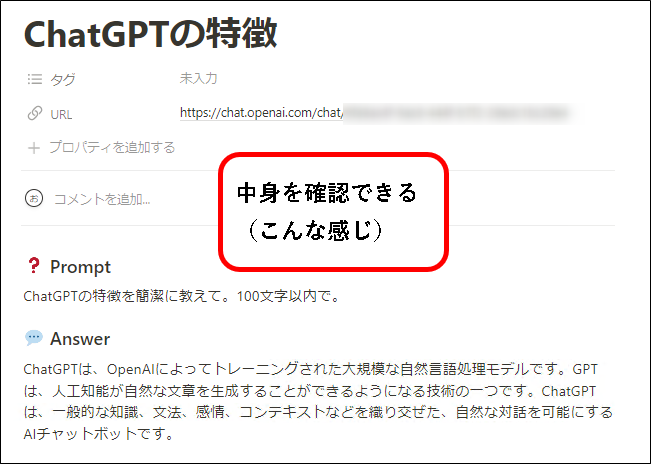
回答単位でNotionに保存する方法の説明は、これでおわりです。
b)会話全部をNotionに保存する
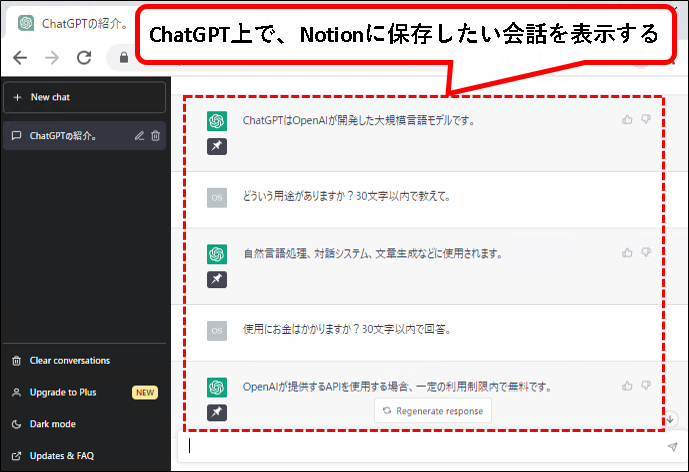
手順1. まず、ChatGPTにアクセスし、ChatGPT上で、Notionに保存したい会話を表示します。
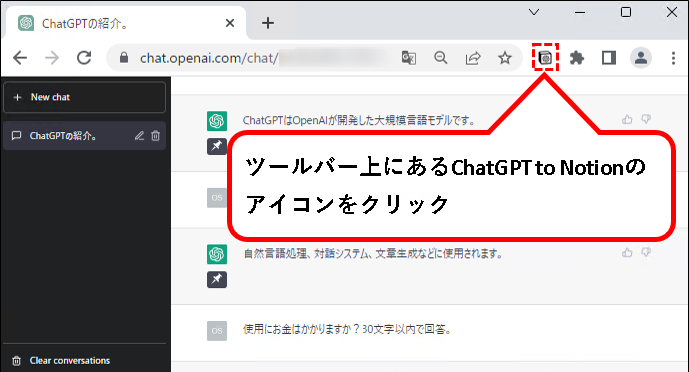
手順2. この状態で、ツールバー上にあるChatGPT to Notionのアイコンをクリックします。
手順3.「No linked DB」と表示された場合、さきほど作成したデータベースをクリックします。

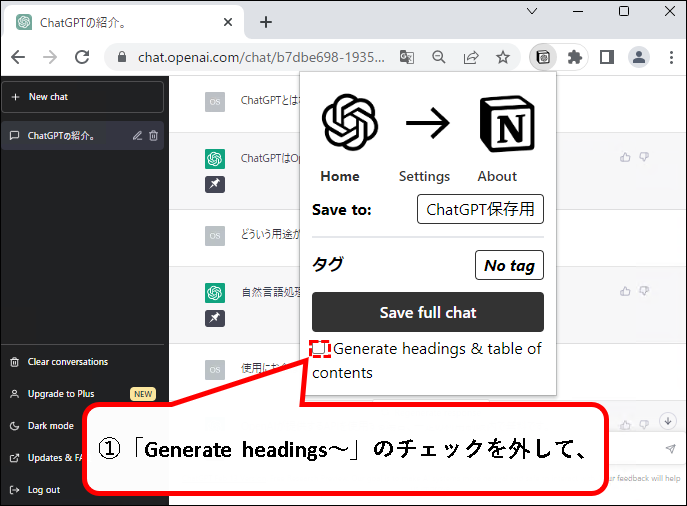
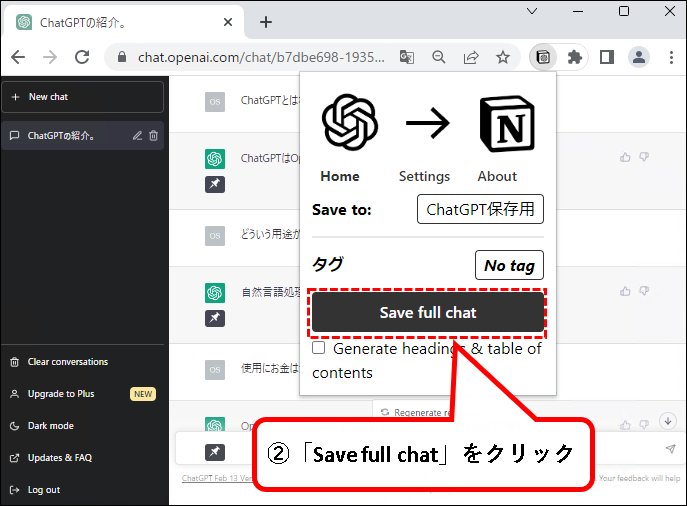
手順4. 以下のようなウィンドウが表示されるので、①「Generate headings~」のチェックを外し、②「Save full chat」ボタンをクリックします。
※「Generate headings~」のチェックが最初から外れている場合、そのまま「Save full chat」をクリック。
メモ
手順では、「Generate headings~」のチェックを外していますが、外さなくても保存は可能です。
その場合、見出し付きで、Notionに回答が保存されます。
手順5. 以下のような画面が表示された場合、Overide(上書き)かAppend(追記)をクリックします。
メモ
Notionのデータベースには、ChatGPTの会話単位でデータが保存されます。
そのため、すでに同じ会話から、回答や会話全体をデータベースに保存していた場合、上書きするか、追記するかの選択を求められます。
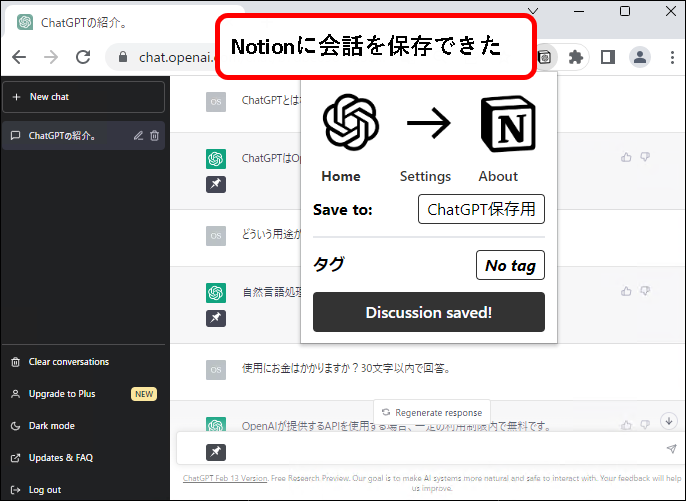
手順6. はい、これでNotionに会話を保存できました。
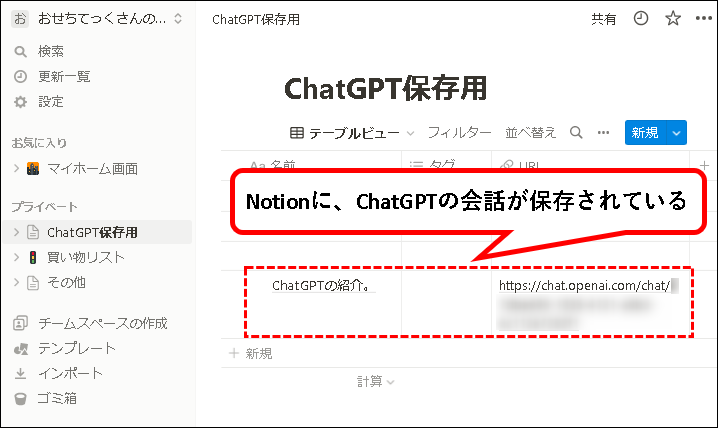
手順7. Notionをみると、データベースにChatGPTとの会話が保存されています。
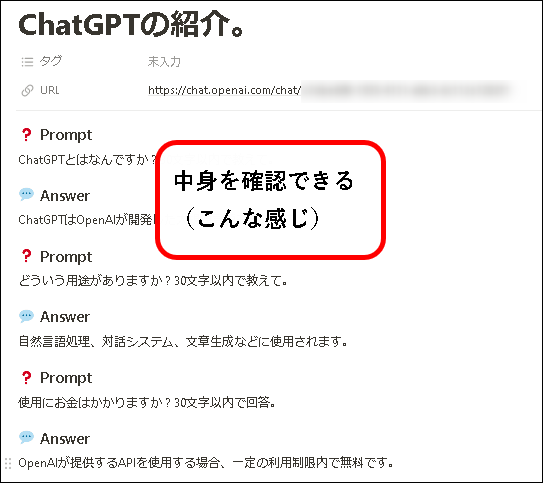
手順8. 保存された会話を開くと、中身を確認できます。

はい、これでChatGPT to Notionの使い方の説明はおわりです。
4.【ChatGPT to Notion】インストール方法と使い方(まとめ)
★ 今回は、紹介した内容は以下でした。
★ その他の、Notion関連の記事に興味があるかたは、以下を参照ください。
★ 今回の内容が、少しでも役に立った、解決したという方がいれば幸いです。
「【ChatGPT to Notion】インストール方法と使い方」 はこれで終わりです。
コメント